Pages

Friday, January 31, 2014

DIY Dollar Store Children Activity Gift Basket


Hi Everyone,

 Hope you're doing well. From this week blog I want to share other DIY gift basket ideas I made for my nephews 6th birthday. I knew everyone in my family was going give him the big gifts, like a tablet, scooter, Nikes, etc. I wanted to give him something we could do together  and that sparked his creativity . I made a visit to the dollar tree near my house.


 Lately, my local dollar tree has expanded the art and crafts session. I love this, you can find great crafting supplies, glue sticks, floral foam, glass beads, wire and much more.
  Anyway, my dollar store now carries  kid 's craft sets, such as sand art, painting clay piggy bankers, origami, and such great stuff all for a dollar. I decided to make a Craft Activity Gift Basket for my little one. He's love the basket.  So far, we made a loin mask, painted a piggie bank , and he's covered my ears with stickers ( sticker earrings). I let him pick want he wants to do. 


 Here's what you need 
 A Large Basket or a plastic container (I got mean at the dollar store) 
 10-15 Kid's craft and activity kits, stickers, markers, Etc.
 White tissue paper
 1 roll of Clear cellophane
 Newspaper 
 Ribbon 
Scissors 


 1) Filled up the plastic container with newspaper 3/4 of the way up. Add the cut stripes of white tissue paper.


2) Add your items (stickers, craft kits, markers, books, ETC)


 3) Lay out the Clear cellophane in the shape into the cross shape. Set the basket in the middle (center) of the cellophane, bring up all four sides and twist and tie a ribbon to close-up the basket. Trim out excess cellophane on the top. 


That's It! 

All done and super easy!


Thanks for your time.

Blessings, 
Shemi 


Sunday, January 26, 2014

DIY Washcloth Lollipops BOUQUET/Centerpiece Arrangement FOR BABY SHOWER GIFT: Great DIY Baby Shower Gift Ideas


DIY Washcloth Lollipops BOUQUET/Centerpiece Arrangement  FOR BABY SHOWER GIFT: Great DIY Baby Shower Gift Ideas


Hi Everyone,


I went to a baby shower this past week. I had a great time. I such a dork, I love baby shower, the goofy games, the creative gifts and, of course,  the delicious food.  


I needed to create a cheap, quick , and unique DIY Baby Gift, so because I'm a self confessed pinterest addict, I spend  two hours looking at all the DIY baby shower gift ideas I could find.
 I couldn't choose between the washcloths lollipops or the baby sock roses.  So, in the end, I  decided to combine both ideas together to create a Washcloth Lollipops BOUQUET/Centerpiece Arrangement.


The couple I made this baby gift for is waiting to find out the gender of the baby when he/she is born . I used  a neutral color scheme. But you could tweak this idea in whatever way you want.


I love baby showers and I enjoy planning them. There are tons of fun, creative ideas for gifts, games , and decorations.


Here's what  I come up with.


Here the supplies you need:


Bucket  ( the Dollar store)
Foam Letters  ( the Dollar store)
Floral Foam  ( the Dollar store)
Scissor
6 pairs of baby socks ( make 12 roses) ( the Dollar store)
Tissue paper ( the Dollar store)
Floral tape ( the Dollar store)
Wooden Skewers ( the Dollar store)
Baby Mints ( the Dollar store)
Plastic baby embellishments ( the Dollar store)
12 baby washcloths ( need two for each lollipop) ( I found my washcloths at ross but you get them at  the Dollar store)
 6 baby utensils ( the Dollar store)
Hot glue gun
 Tape  ( the Dollar store)


1) First you're going to add your foam letters to the metal bucket. I spelled out the word baby.


2) Next measure the floral foam to fit the inside  of your bucket.  Wrapped the foam with white tissue paper and tuck fount behind to cover top of foam.


3) To make the washcloth lollipop, you face the washcloth pattern side down and roll up tight in a log. Repeat with second washcloth, Tape down the seam like this


Begin rolling one of the washcloths together cinnabun or pinwheel  style. Make sure that you have the tape sides facing the same direction so you get a good clean look on top. Tape the second washcloth to the end of your first coil washcloth and continue rolling it around.


Turn the roll(the rolled up washcloths) over and tape a baby utensil  to the back of it. I criss crossed the two pieces. Repeat with remaining washcloths until you have 6 Wash cloth lollipops.


4) to the Baby Sock Roses .Lay out your first baby sock.Now, start to fold the toe of the sock upwards.  Roll the base of the sock up so that it is parallel to the opening of the sock.


Then slightly angle the toe of the sock upwards, toward the opening. Keep your rolls fairly tight, but don't overly tug or stretch the sock while rolling it up. Roll until to the edge of the sock. while holding the rolled sock together with one hand, take the opening of the sock with the other hand and begin to open the sock (inside out) around the rolled sock until you have wrapped the opening about half-way up the the length. Now stick a skewer in the bottom of your rose and take to secure. You can also use wire and floral tape if you want like this. Repeat with remaining socks.


5) Now hot glue the mints to wooden  skewers. Repeat with Baby Embellishments.


6) Cut down embellished skewers to  desire size to fit in you bucket.


7) Arrange all the lollipops, roses, embellished skewers in your bucket. That's it you did it:)


Who wouldn't love such a beautiful unique baby gift.


Thanks For Visiting!!


I also Sell these arrangements in my Etsy Shop.


What's your favorite  DIY Baby Gift to make?


If you have any questions please let me know!


Blessings
Shemi


Friday, January 17, 2014

• DIY Dollar Store Belt and Scarves Holder/ Organizer


Hi Everyone,


Are you looking cheap ways to organize your scarves and belts in your closet? I have solution for you and your closet.


The best part of this project,  is the cost is less than a dollar to make.  You can find all the supplies you need about your local dollar store.


For this easy project, all you need is shower hooks, a hanger, and your scarves or belts.


Here's how you do it.


1) Simply  add the shower hooks to the hanger. Tie your scarves to the hanger.


I also made a short video on  you tube


You-tube Video


Thursday, January 16, 2014

DIY Valentine's Tea Bag Holder


Hi Everyone,

Hope you're keeping warm. It's so cold in Colorado right now. Which is why I going to share how make tea bag holder,

Today, I want to share another Quick,  and Easy Valentine's Craft gift idea.  DIY Valentine Tea Holders are so simple to make. All you need is paper, scissors or paper cuter/paper scorer( I sometimes use the back of spoon ), a tea bag, and a glue stick. This valentine's project is easy and cheap to make. 

Finally, a valentine gift for adult. Share the love,  Make these cute tea bag holders for your co-workers, friend, and family. You can create them for every occasion. I made these tea bag holders for my Mother for Christmas, for her co-worker, they loved them.


Do you know January is Hot Tea Month? So sit  back and warm up on a delicious , hot cup of tea. My favorite is Chai. I love and I'm addicted to it 

Let's Start:

Here what you need:
Scrapbook Paper( I used 81/2" to 11" inches card stock  and a regular valentine scrapbook paper)
Paper Cutter
Glue Stick 
Embellishments if you so desire


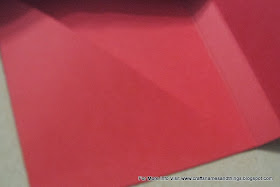
1) Grab your card stock  and cut down your  paper ( card stock) to 31/2" by 11" inches. 


2)  Score at  31/2" and 7" and 71/2"


3)  Hold your paper as shown  and cut the third panel at a diagonal angle to create a pocket.


4) Grab your glue stick and adhere the pocket to the second panel. Allow to dried.


5)  The next step are optional.  In order to embellish, I cut two 1 x 3-1/2 inch bands of  scrapbook paper. I also cut a diagonal triangle for the pocket. I then add these elements to my tea bag holder. 


6)  Add your tea bag to the pocket. All Finished. Great job!!


What's your Favorite type of tea?

If you have any questions please let me know:)

Please post your creations Here.


Blessings 
Shemi